Outlook (Windows): Setup POP Account for Web- & Mailhosting
Do you have email or web hosting with Green and use Outlook as your email programme on your Windows PC? In this guide, you will learn how to quickly and easily set up your mailbox for Outlook on Windows.
Note: Make sure that you have already created the email address in your Web & Mail Control Panel.
Content
- Validity
- Outlook Classic
- Outlook (New)
Validity
This guide is valid for the following customers:
| Operating System: | Windows 10 Windows 11 |
| Mailclient: | Outlook |
| Mailclient Version: | Outlook Classic Outlook (New) |
| Hosting Product: | Webhosting E-Mail Hosting WordPress Hosting Windows Hosting |
| Account type: | POP |
Outlook Classic
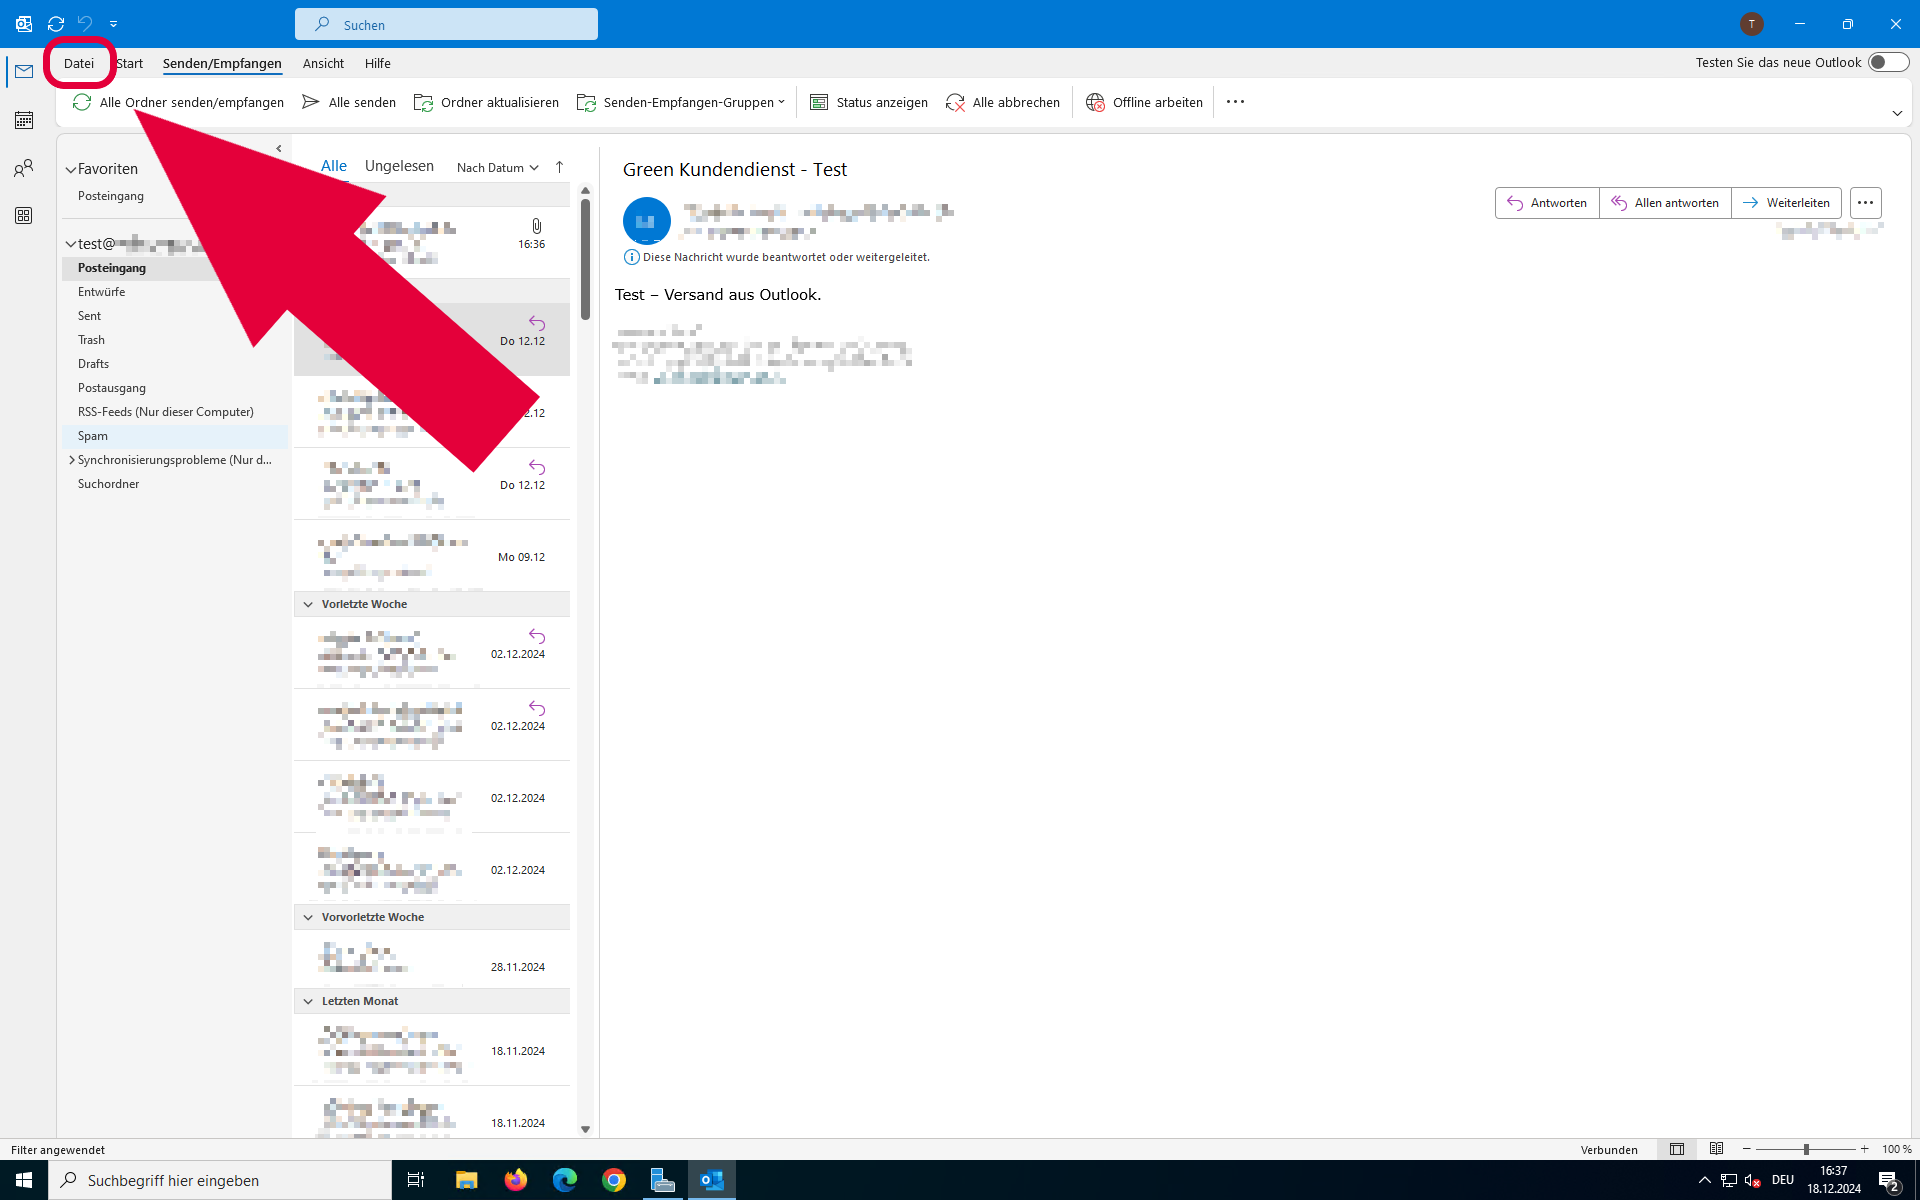
In Outlook click on the upper left-hand menu button titled File.
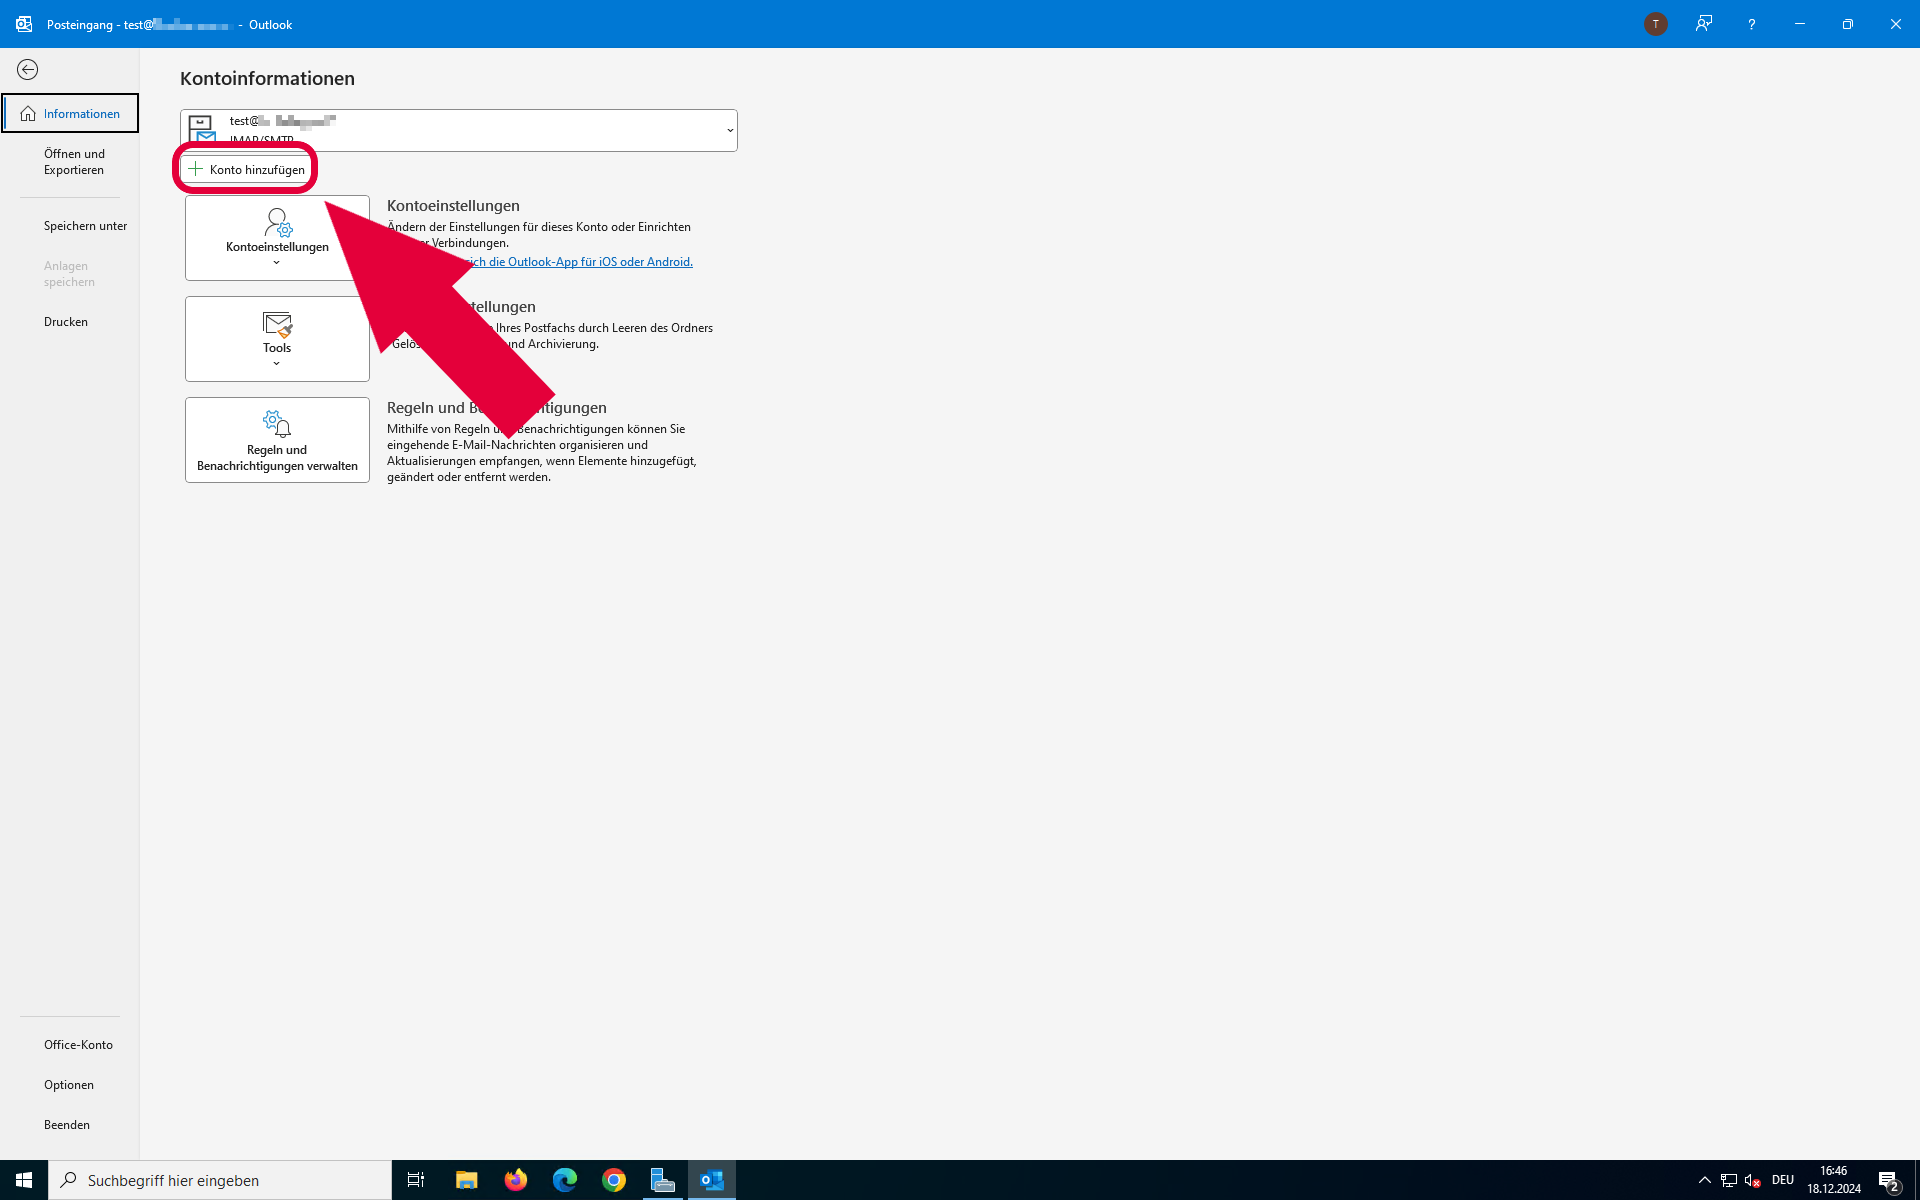
In order to setup a new account, click on the +Add Account button.
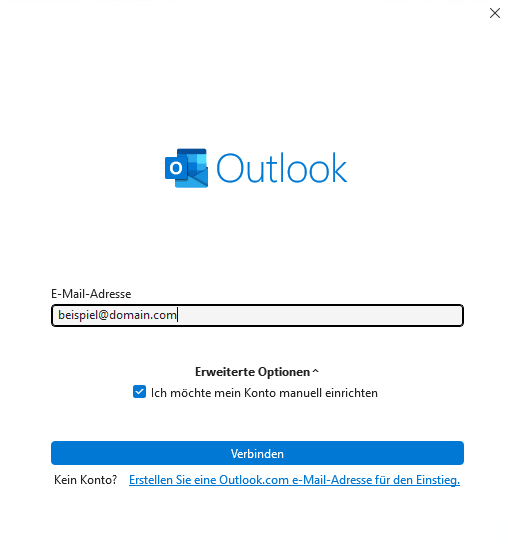
Now enter the email address you have already created in your Web & Mail Control Panel.
- Under Advanced options, select the option Let me set up my account manually.
- Click Connect.

In the Advanced setup, you have the option to select your account type.
- Choose the option POP.
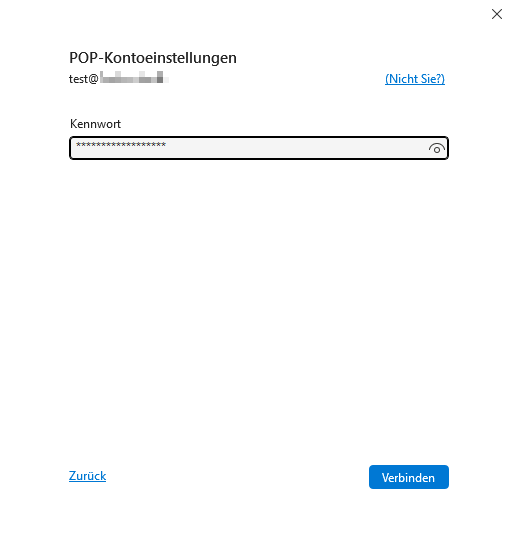
- Enter the password for your email address.
- Click Connect.
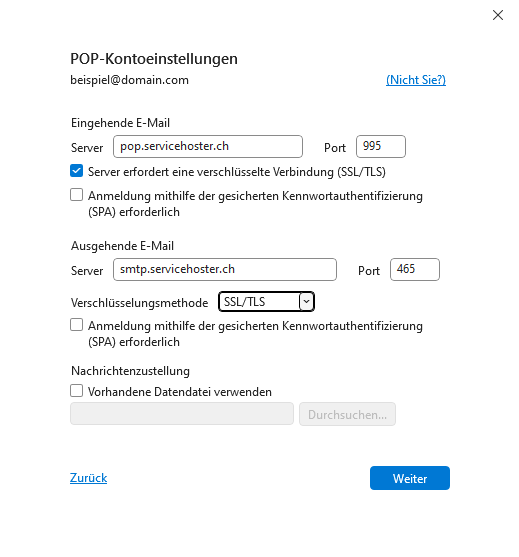
Inside the menu POP Account Settings you may now define the Email Server Connection Data that you would like to use.
- Activate the option at This server requires an encrypted connection (SSL/TLS) by clicking on the checkbox (blue checkmark).
Use the following values to set up your new POP account:
| Incoming POP Server: | pop.servicehoster.ch |
| Port: | 995 |
| Encryption method: | SSL/TLS |
Use the following values to set up your new SMTP account:
| Outgoing SMTP Server: | smtp.servicehoster.ch |
| Port: | 465 |
| Encryption method: | SSL/TLS |
Click Continue.
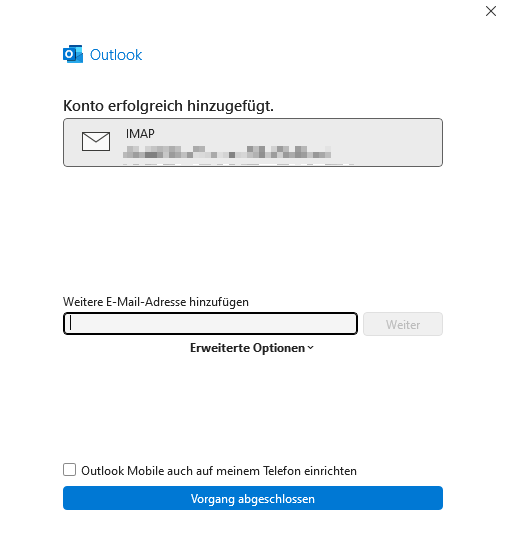
In order to finish the setup process, click on Done.
Congratulations! You have successfully added your email address to your Outlook Classic application.
Outlook (New)
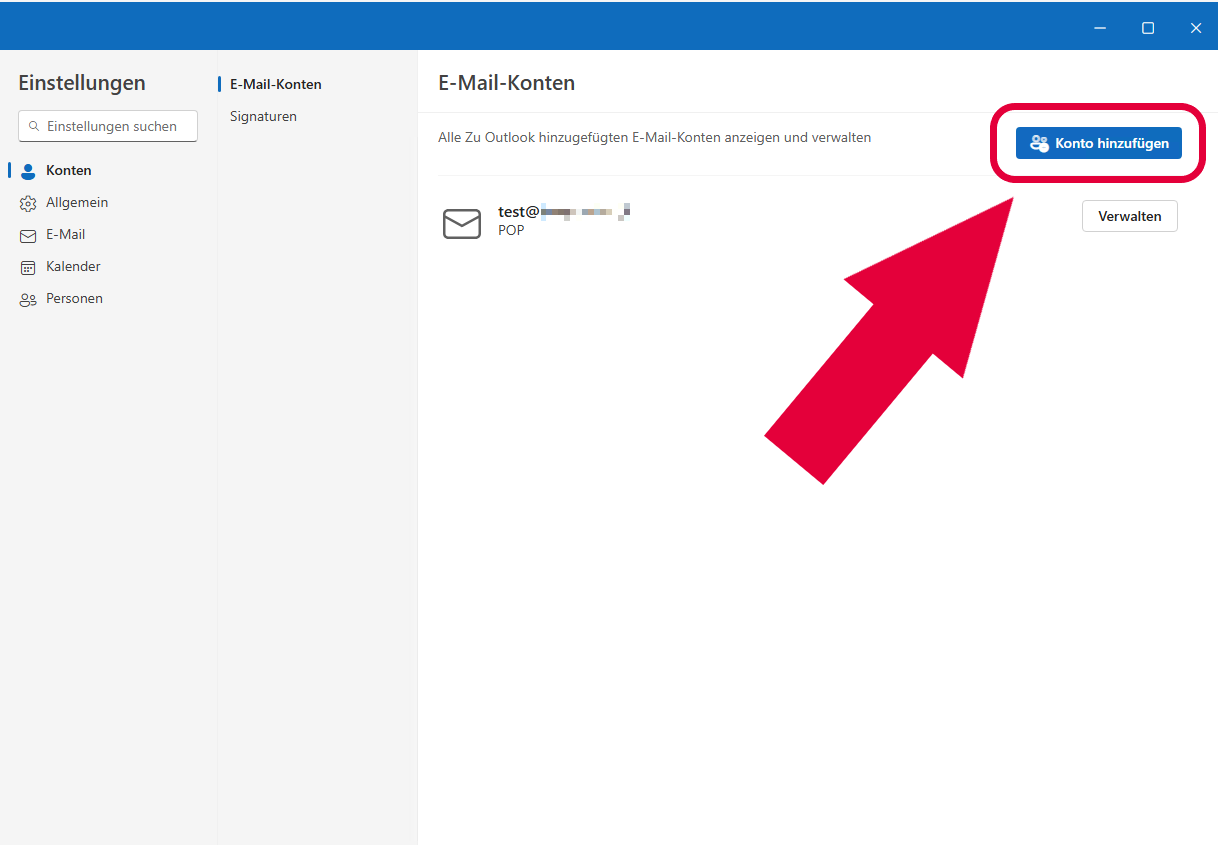
Open Outlook (New) on your computer. If you have already set up an account, click on the cog icon in the top right-hand corner to access the settings.
Under the Accounts section, click on the Add Account button.
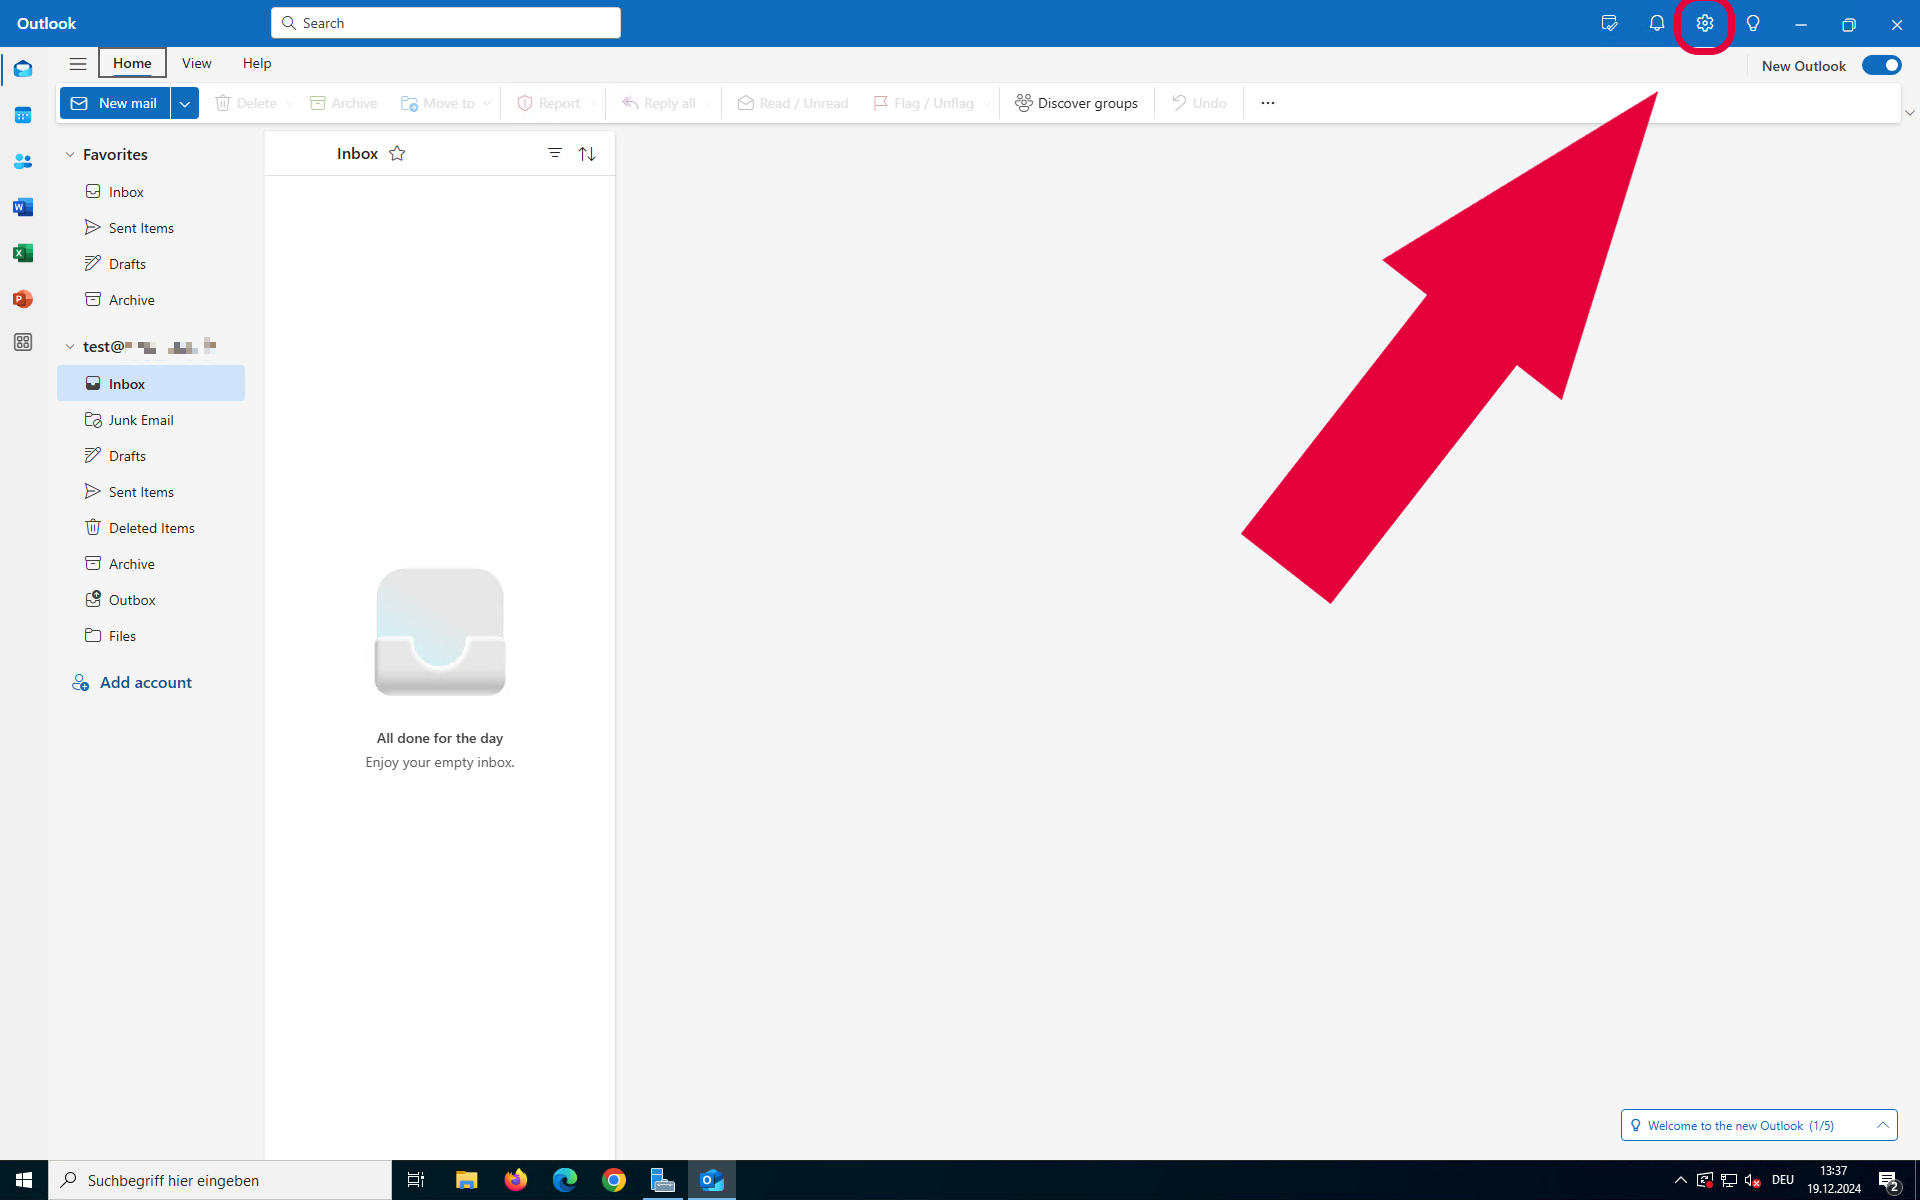
Under the section Accounts, click on the button titled Add Account.
![[Translate to Englisch:] Outlook (New) - Neues Konto einrichten](/fileadmin/_processed_/4/3/csm_outlook-new-fresh-setup__c99afdacb0.png)
Enter in your Email Address.
- Then click continue.
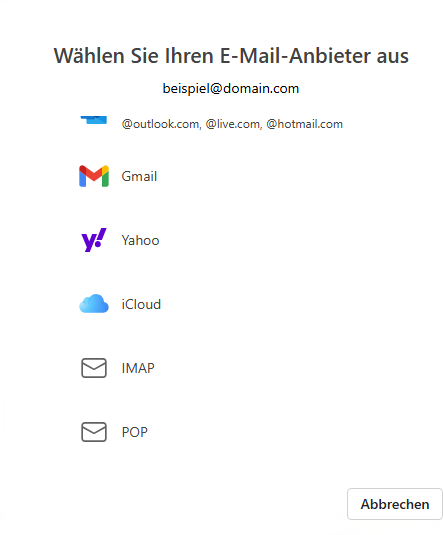
You will now be prompted to select your email provider.
- Select the option POP from the list.
![[Translate to Englisch:] Outlook (New) - POP-Kontoeinstellungen](/fileadmin/_processed_/8/0/csm_outlook-new-fresh-setup-pop-filled-01__1999f4b960.png)
- Enter your email password under the field password.
- Activate the option Show more by clicking on the slider (blue colour).
- Deactivate the option to Use recommended settings by clicking on the slider (grey colour)
Use the following values to set up your new POP account:
| POP Incoming Server | pop.servicehoster.ch |
| Port | 995 |
| Secure connection type | SSL/TLS |
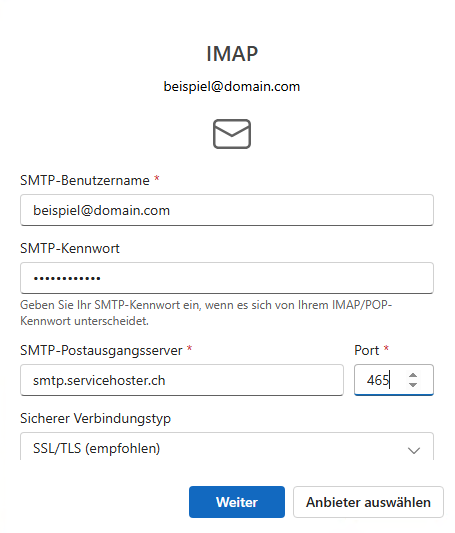
- Enter in your email address in the field SMTP username.
- Enter in the password for your email address in the field SMTP password.
Use the following values to set up your new SMTP account:
| SMTP Outgoing server | smtp.servicehoster.ch |
| Port | 465 |
| Secure connection type | SSL/TLS |
- Click Continue.
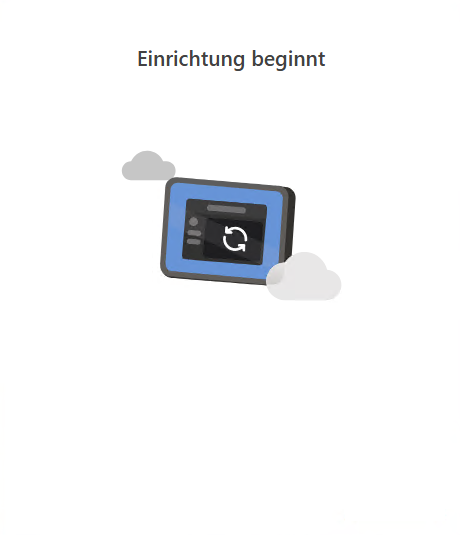
Outlook (New) will set up your mailbox for you in the background.
- Choose whether you want to allow optional diagnostic data to be sent to Microsoft.
- Then click Next.
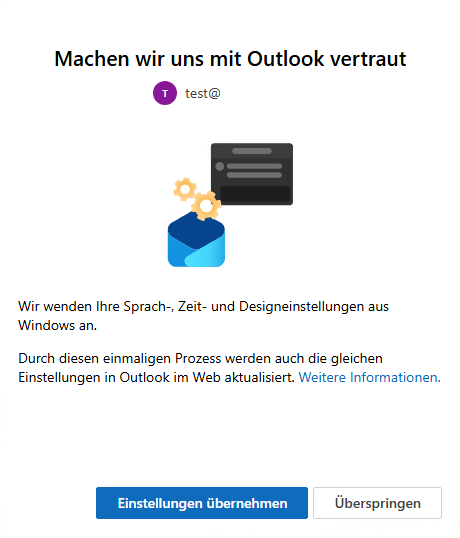
Once the mailbox has been set up in Outlook (New), you can familiarise yourself with the new Outlook. You can also do this later.
- To do so, click Skip.
Congratulations! You have successfully added your email address to your Outlook (New) application.