
Hosted Exchange: Create a Contact in EdgePilot
Note: This help article applies only to Hosted Exchange. If you are not sure which email service you use, you can find further information in the following article.
https://www.green.ch/en/which-email-service-do-i-use
In Hosted Exchange, you can create contacts in EdgePilot. Contacts are often used to make external email addresses available within the Hosted Exchange organisation or to use them as forwarding destinations.
A contact is not a mailbox and does not have its own sign-in. Emails cannot be retrieved or stored through a contact.
What Is a Contact Used For?
A contact serves as a directory object for an external email address.
Typical use cases include:
- Using an external email address as a forwarding destination
- Making external recipients available in the Exchange address book
- Using external addresses in Hosted Exchange configurations
A contact differs from a user or mailbox. It does not have its own mailbox or password.
Requirements
- You have an EdgePilot user with administrator permissions.
- You know the external email address that is to be created as a contact.
A normal mailbox user does not automatically have administrator permissions.
You can find further information about administrator permissions in the following article:
https://www.green.ch/en/how-do-i-assign-admin-permissions-to-a-user
Create a Contact in EdgePilot
Open the EdgePilot administration portal:
- Sign in with your administrator user.
- Open Exchange.
- Select Contacts.
- Create a new contact.
- Enter a meaningful contact name.
- Enter the external email address as the destination address.
- Save the contact.
The contact is then available within the Hosted Exchange organisation.
Use a Contact as a Forwarding Destination
When forwarding to external email addresses, it may be necessary to create the external address as a contact first.
- Create the contact with the external destination address.
- Then open the required user under Users and User Management.
- Open Exchange Settings.
- Select Forwarding, Aliases & Policies.
- Select the previously created contact as the forwarding destination.
- Save the changes.
Note: If emails are to be forwarded to an external email address that does not yet exist in Hosted Exchange, it may be necessary to create a contact before forwarding can be set up.
Special Consideration When Creating a Contact
When entering a contact name, the field containing the contact’s email address may be filled in automatically.
However, the stored external destination address is decisive for forwarding.
The external destination address determines the address to which the messages are actually delivered.
Difference Between a Contact, User and Mailbox
Contact
- No mailbox
- No password
- No sign-in
- Reference to an external email address
User with Mailbox
- Own mailbox
- Own password
- Own sign-in
- Sending and receiving emails
Related Articles
Forwarding, mail aliases and distribution groups:
https://www.green.ch/en/hex-mail-aliases-forwarding-and-distribution-groups
Create a mail alias:
https://www.green.ch/en/hosted-exchange-create-mail-alias-in-edgepilot
Create a distribution group:
https://www.green.ch/en/hosted-exchange-create-a-distribution-group-in-edgepilot
Hosted Exchange basics:
https://www.green.ch/en/all-about-hosted-exchange
HEX 2016: Create contact Edgepilot
To create a contact, log in to green.edgepilot.com with your administrator access.
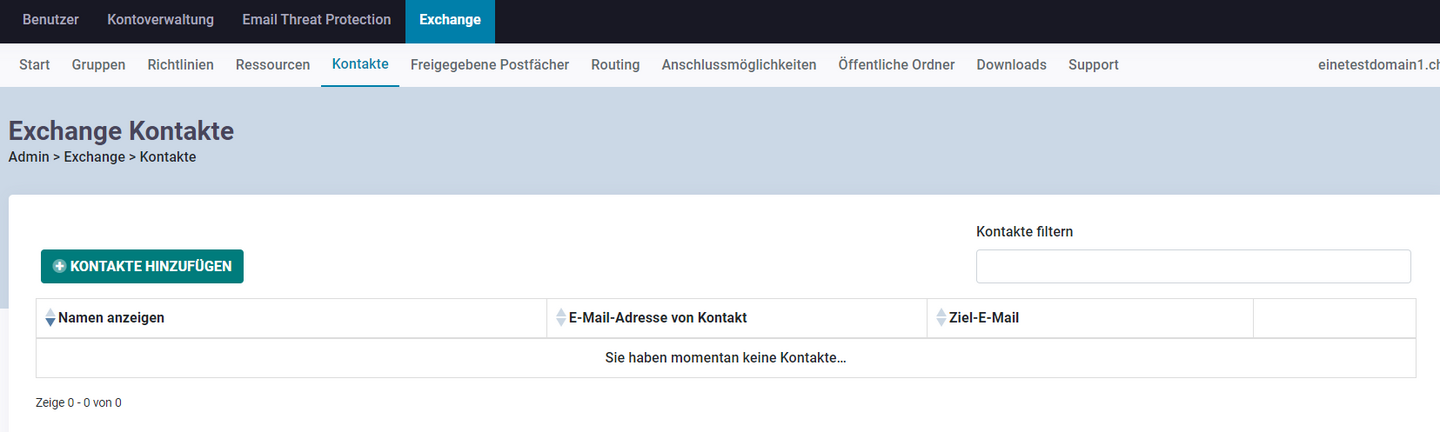
2. Now click on the menu item "Exchange" and then on "Contacts".
Now navigate to the menu item "Add contact".
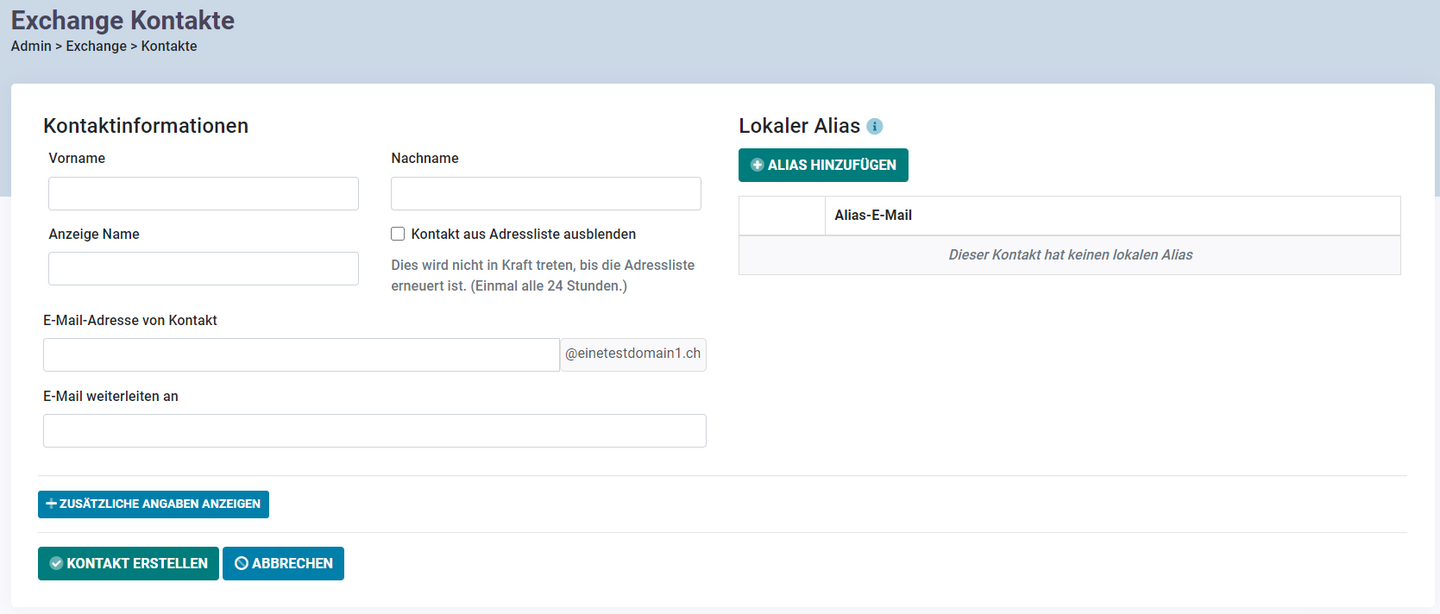
3. Now follow the screen information.
Now deposit the information according to your liking / defaults.
First name: the first name of the contact
Last name: the last name of the contact or also e.g. Info, Contact, etc.
Display name: the name that will be displayed to you.
Hide contact from address list: activate this option if you do not want the created contact to be displayed in the address list.
Contact email address: this is automatically created from the first and last name, but can be customized as desired.
Forward email to: enter here the email address of the contact you want to forward the email to.
Add local alias: in this menu item you can create an alias email address for the contact under your domain. (All mails sent to this alias address email address will be forwarded directly to the contact).
Now click on the "Create contact" menu item.
Now you have created the contact.