
Hosted Exchange: Create User in EdgePilot
Note: This help article applies only to Hosted Exchange. If you are not sure which email service you use, you can find further information in the following article.
https://www.green.ch/en/which-email-service-do-i-use
New users and email addresses for Hosted Exchange are created in the EdgePilot administration portal. You need an administrator account to create them.
An email address is not automatically a separate mailbox. For a user to sign in independently, store messages and use the email address as an email account, a Hosted Exchange service with a mailbox type must be assigned to the user.
http://www.green.ch/de-ch/e-mailoffice/hostedexchange.aspx
Create User
- Open the EdgePilot administration portal.
- Sign in with your administrator account and the associated password.
- Open the Users menu item.
- Select User Management.
- Click ADD USER.
Step 1 – User Details
Enter the details of the new user.
- Email Address: Enter the required email address.
- First Name: Enter the user’s first name.
- Last Name: Enter the last name or a designation such as Info, Contact or Support.
- Enter Password Manually: Use a generated password or assign your own secure password.
- Send Welcome Email: If you enable this option, the user receives a welcome email.
- Administrator: Enable this option if the user is to receive administrator permissions.
You can find further information about secure passwords in the following article:
https://www.green.ch/en/secure-password
Step 2 – Add Service
Assign the required services to the new user.
- SpamLab: Specify whether the user receives a daily spam report.
- Exchange: Enable the Hosted Exchange mailbox.
- Mailbox Type: Select the required Hosted Exchange service.
- Enable the Exchange option.
- Under Mailbox Type, select the required service.
- Click ADD USER.
After saving, the new user appears in User Management.
Assign a Service Later
In User Management, check whether an active service is assigned to the email address. Without an assigned Hosted Exchange service, the email address cannot be used as a mailbox.
- Open Users.
- Select User Management.
- Select the required user.
- Enable the Exchange service.
- Select the required Lite, Lite Plus or Full service.
- Click ADD SERVICES.
An existing mailbox can later be changed to a different mailbox type. You can find further information in the following article:
https://www.green.ch/en/hosted-exchange-upgrade-mailbox-in-edgepilot
Assign Administrator Permissions
A normal mailbox user does not automatically have administrator permissions. Enable the Administrator option only if the user is to perform administrative tasks in EdgePilot.
You can find further information in the following article:
https://www.green.ch/en/how-do-i-assign-admin-permissions-to-a-user
Check the Mailbox After Creation
Test a newly created mailbox in the associated Hosted Exchange Webmail. A successful sign-in confirms that the email address, password and mailbox are generally available.
If sign-in does not work, check whether an active Hosted Exchange service is assigned to the user and whether you are using the correct password.
Note: If the details are correct, the Hosted Exchange service has been assigned and sign-in is still not possible, contact Support.
Related Articles
Rename Hosted Exchange user:
https://www.green.ch/en/rename-hosted-exchange-user
Information about the SAM user:
https://www.green.ch/en/hex-sam-user
Create a mail alias in EdgePilot:
https://www.green.ch/en/hosted-exchange-create-mail-alias-in-edgepilot
Create a distribution group in EdgePilot:
https://www.green.ch/en/hosted-exchange-create-a-distribution-group-in-edgepilot
Create a contact in EdgePilot:
https://www.green.ch/en/hosted-exchange-create-contact-in-edgepilot
Release an email in EdgePilot:
https://www.green.ch/en/hosted-exchange-release-email-in-edgepilot
Reset the password for a Hosted Exchange mailbox:
https://www.green.ch/en/reset-email-password-hosted-exchange
Further information about Hosted Exchange:
https://www.green.ch/en/all-about-hosted-exchangewww.green.ch/en/all-about-hosted-exchange">https://www.green.ch/en/all-about-hosted-exchange
Questions / Unclear Points
- The source material does not clearly indicate which features are included with each of the currently selectable Lite, Lite Plus and Full mailbox types.
- The URL listed in the previous article
- is not included in the available article URLs and was therefore not retained.
- The source material does not clearly indicate the address to which the welcome email is sent or the information it contains.
HEX 2016: User creation in Edgepilot
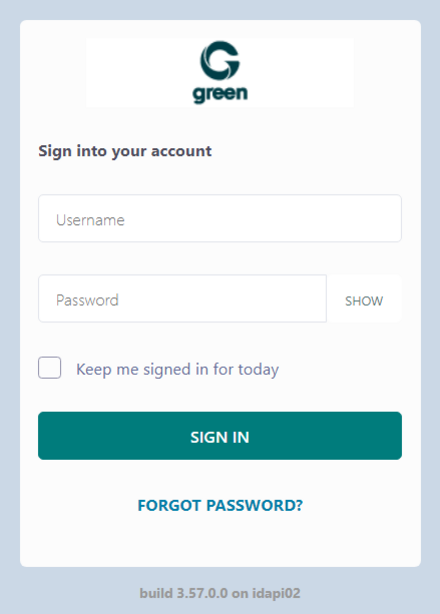
1. To create a user/mail account, log in to green.edgepilot.com using your administrator access.
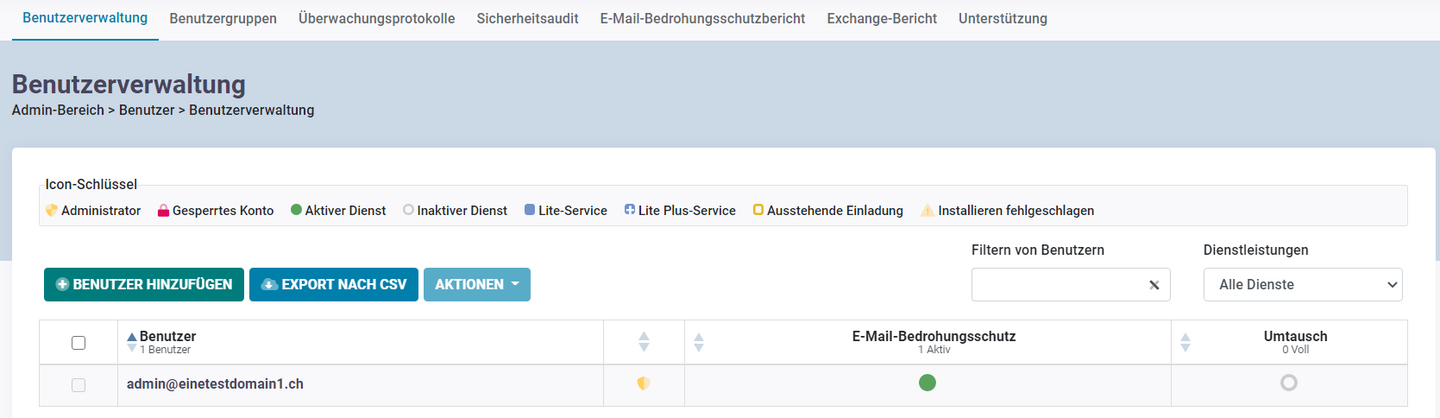
2. Now click on the menu item "User" and then on "User administration". This step is to ensure that you are in the correct menu item. After entering the customer portal, this is (by default) the start page.
Now click on the menu item "Add user".
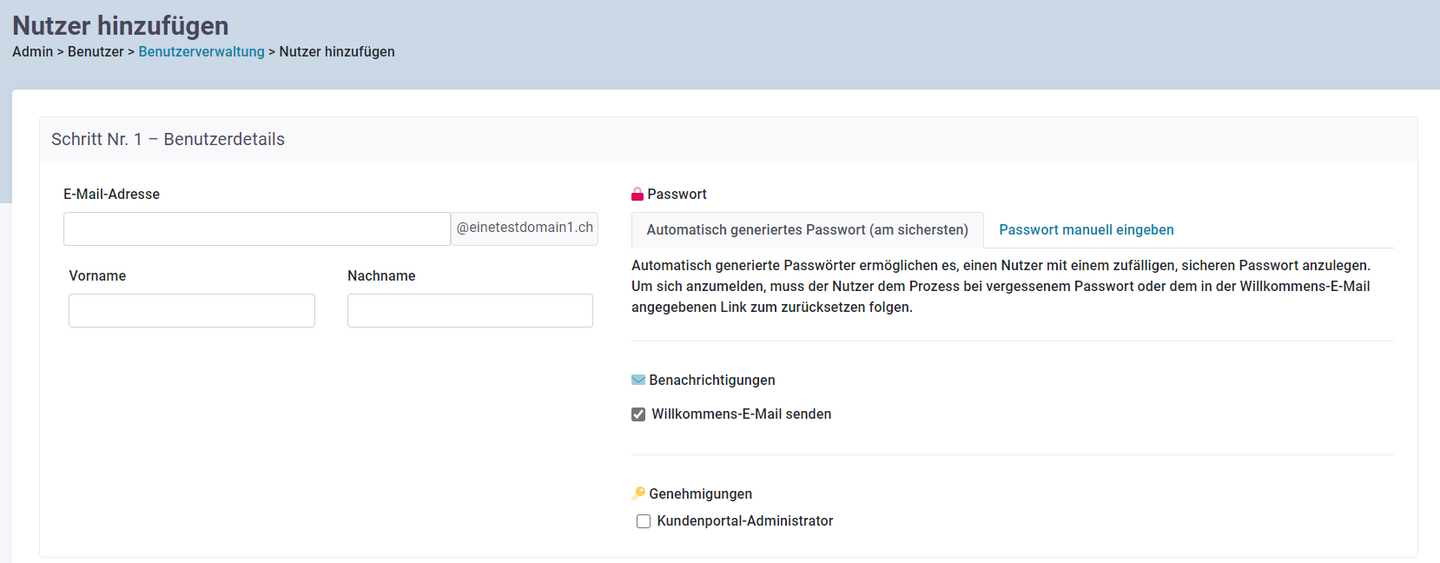
3. Now follow the screen information
Step no. 1 – User details
Now store the information according to your preferences/specifications.
E-mail address: The desired e-mail address
First name: Your first name
Last name: Your last name or also e.g. info, contact, etc.
Enter password manually: Generate password or choose a new secure password.
Send welcome e-mail: If checked, a welcome e-mail will be sent to the user.
Administrator: here you can activate administrator rights for a user.
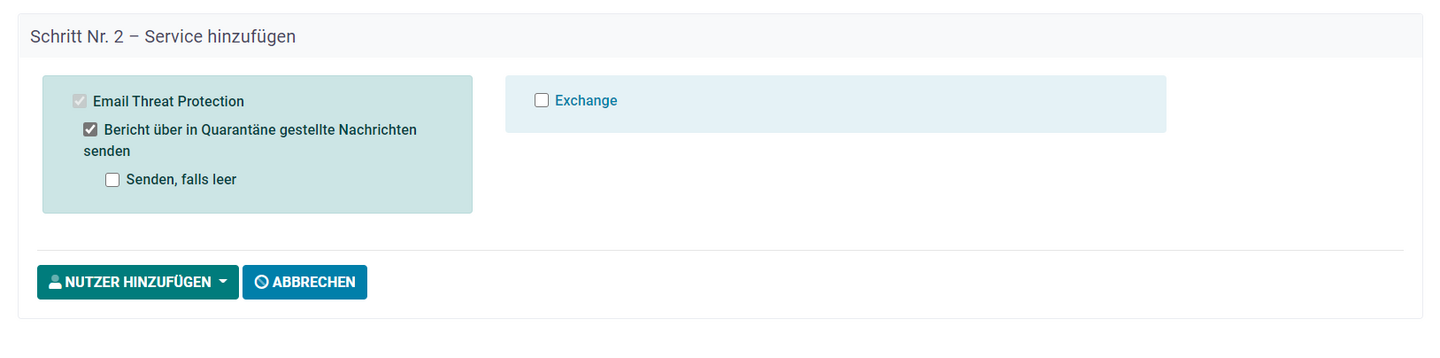
Step no. 2 – Add service
In the left field (SpamLab), define whether the newly created user will receive a daily spam report.
In the right field (under Exchange) you can define the mailbox type.
To do this, activate the Exchange option and then select the desired service under "Mailbox type".
Under the following link you will find the details of the corresponding mailbox types (licenses):
Link to mailbox types
Now click on the menu item "Add use
Now you are back on your original user interface and the user is created.